Wheelchair ramp
Blog
  • Rolling Aluminum Ramp -  Case Of Wheelchair Access For School Stage Rolling Aluminum Ramp - Case Of Wheelchair Access For School Stage
    Aug 22, 2022
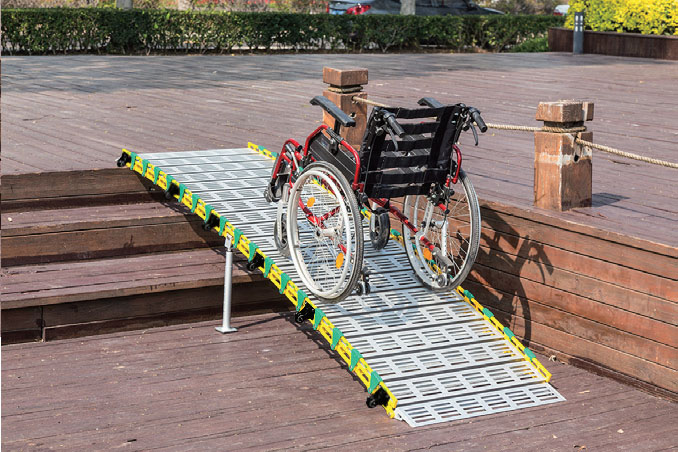
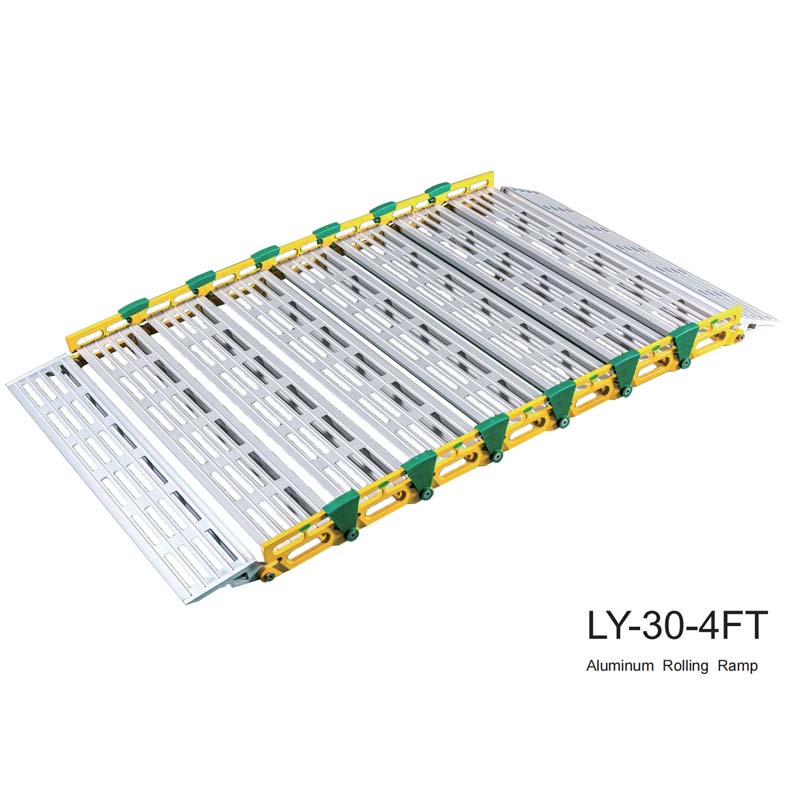
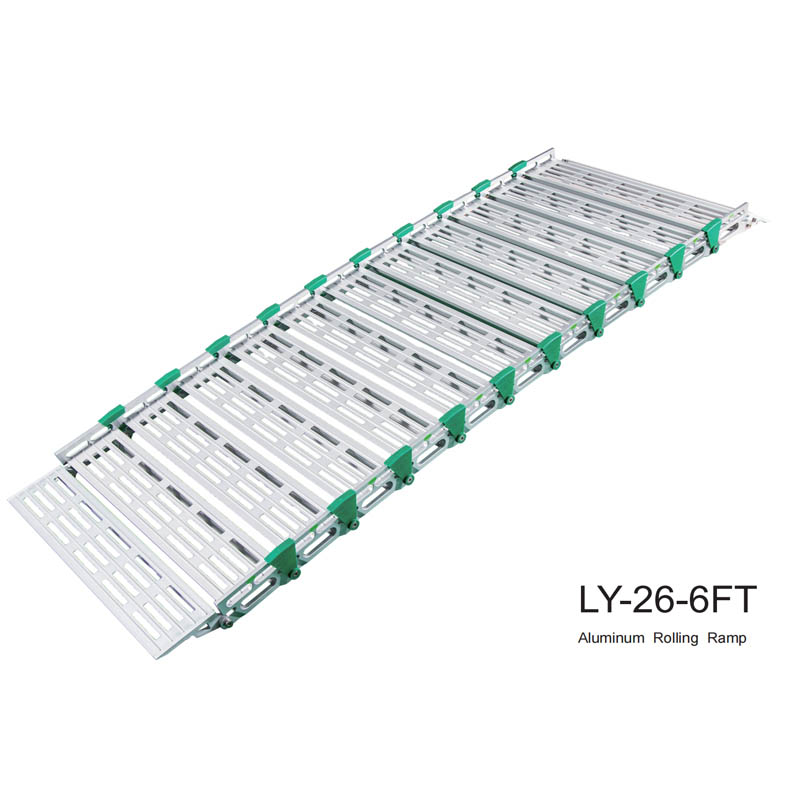
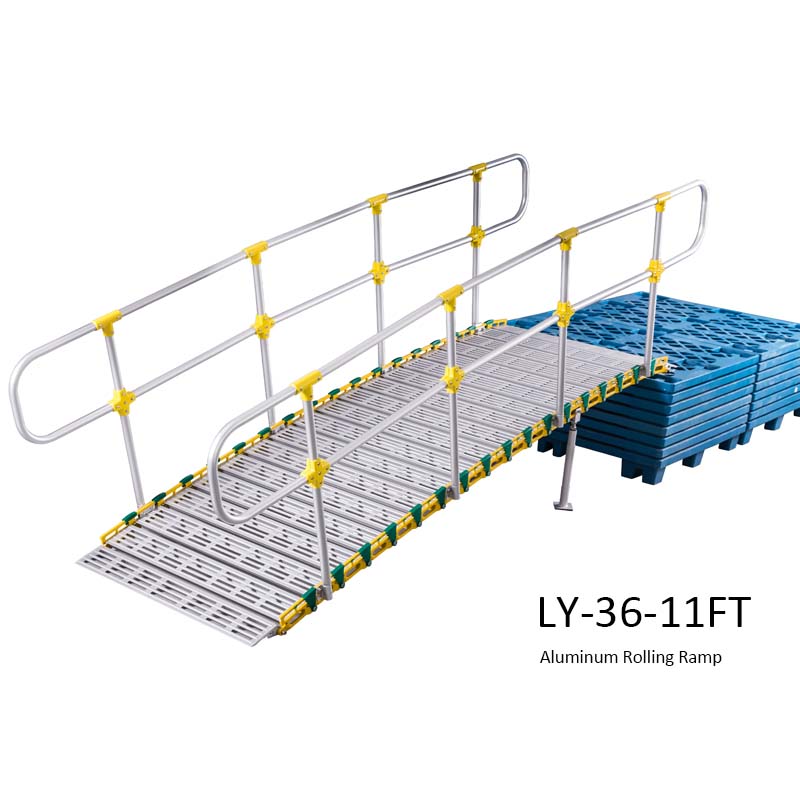
    The height of the school playground stage and indoor activity classroom is generally 20 cm, 40 cm and 60 cm. There are stairs and handrails on both sides. For this type of stage barrier-free construction, it is not easy to build passages at both ends of the stage while meeting the standard slope. Therefore, it is possible to build a segmented and movable ramp at the front of the stage, which is less difficult and easier to achieve.   Case information: The indoor stage of a school in Asia is 1 meter high, and the slope length needs to meet the government standard slope of 1:12 or 1:8. The side of the ramp needs to comply with government regulations and be 5 cm high. Ramps need to be against walls, and ramps and joints need to be passable. When storing, it needs to be disassembled.   Solution: Portable roll aluminum ramps with 10m and 9m lengths. 1 meter 4 directions support frame. The length is 10 meters, and the platform transition of 50 cm and 4 azimuth supports is made in the middle.   The ramp side panels at the junction of the top and the stage do not exceed the stage for easy wheelchair access.   Wheels are installed on the side of the ramp, which can be rolled up and pulled away when stored.   The panel is provided with ribs, and the anti-skid effect is obvious.   The ramp and the support frame are connected and fixed by a lock, and it is easy to disassemble. The end of the top ramp is used as a blocking plate to prevent falling.   Legend: The base of the support foot is cut on one side, which is convenient for leaning against the wall.
    Read More
  • Shower chair - comparison of suction cup mats and original mats Shower chair - comparison of suction cup mats and original mats
    Aug 22, 2022
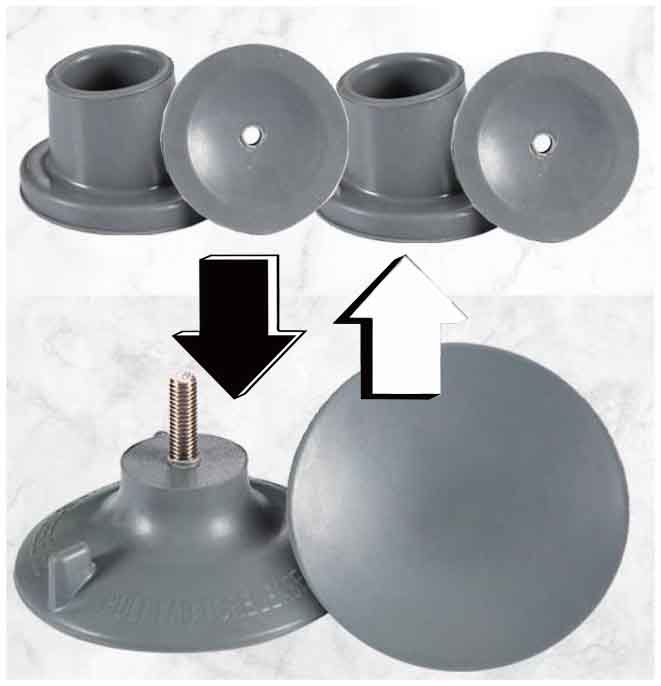
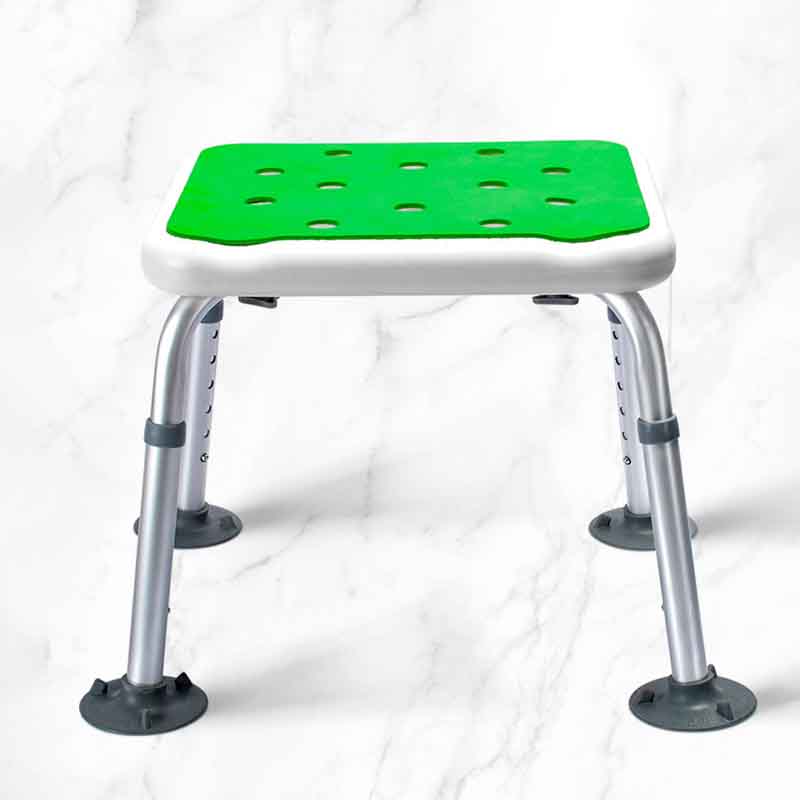
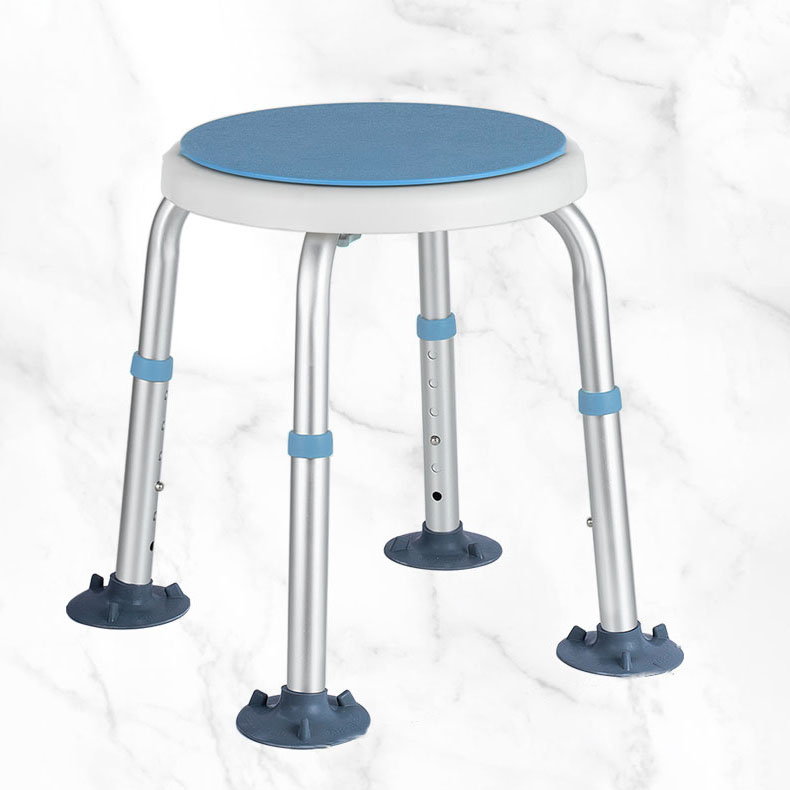
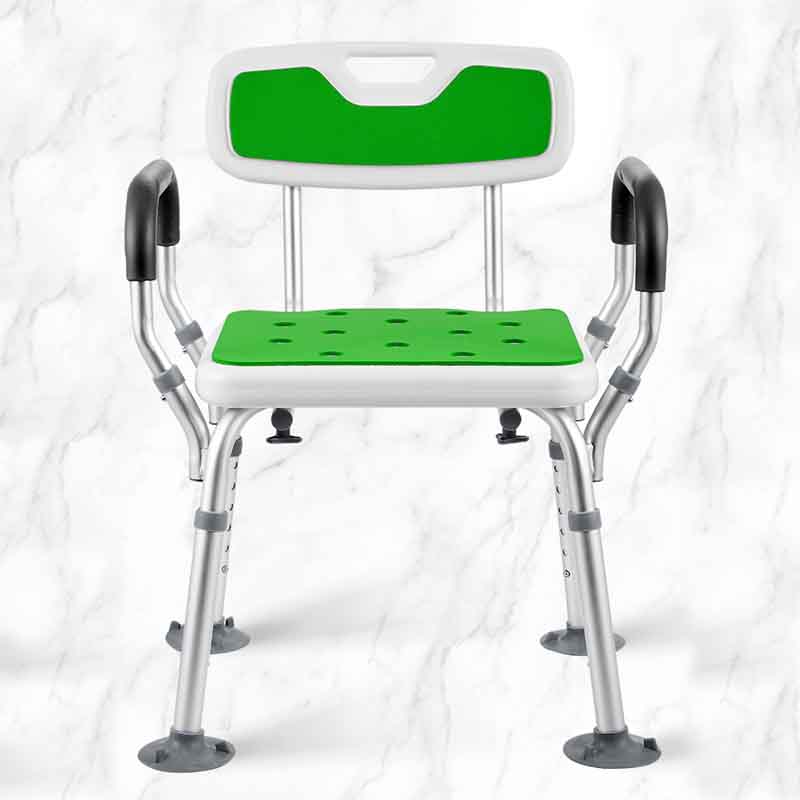
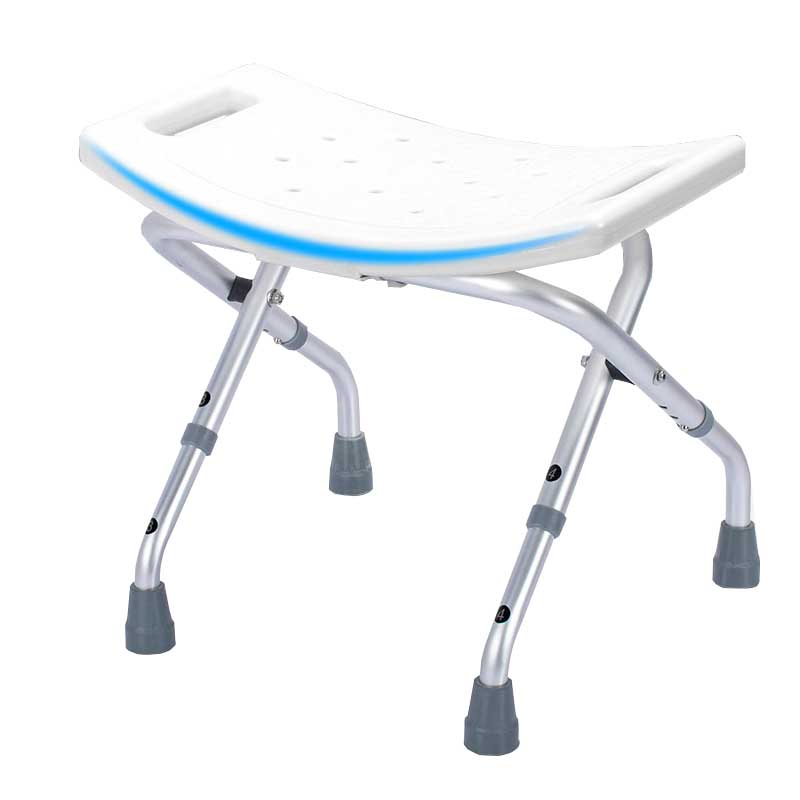
    When the legs and feet can still walk, but when taking a bath, the water temperature is high, the bathroom is relatively closed, the air is not circulated, it is easy to feel dizzy, and it is impossible to stand for a long time. Especially when movement is reduced by illness, aging, childbirth or accident. A shower chair that can fit in a wet bathroom is very important.   One of the most important properties to evaluate a bath chair is its slip resistance. Usually reflected in the four support feet of the bath chair.   Shower chair original foot pad: The material is divided into rubber and TPR, both of which have the characteristics of non-slip. Size: 6 cm in diameter It is a common accessory part for bath chairs. In the shower, it is recommended to lean against the wall. Because of the fear of the occurrence of unexpected events such as rollover or overturning, unnecessary injuries may be caused.     Suction foot pad: The material is the same as the original mat. In addition to the anti-slip feature, the anti-rollover function has been added. At the same time, it takes into account the characteristics of the original foot pads that can be moved. Size: 10cm in diameter The suction cups hold the ground firmly. It can only be lifted by manually pinching the "little ears" on the foot pads. It perfectly solves the risk that the bath chair may roll over.   Both types of pads have their own advantages, the key is how to use them.   Shower chairs with suction cup feet in the store also come with original foot pads. Welcome to purchase!
    Read More
  • Series - Introduction to the Development and Historical Knowledge of Accessible Design (I) Series - Introduction to the Development and Historical Knowledge of Accessible Design (I)
    Aug 22, 2022
    At the beginning of the 20th century, due to the call of humanitarianism, a new method of architectural design-barrier-free design was born in the field of architecture. It uses modern technology to build and transform the environment, provide convenient and safe space for the majority of disabled people, and create an environment for equal participation. The international research on the accessibility of the physical environment can be traced back to the early 1930s, when Sweden, Denmark and other countries built facilities for the disabled.   In 1961, the United States established the world's first Accessibility Standards. Since then, dozens of countries and regions, including the United Kingdom, Canada, and Japan, have successively formulated regulations. China first proposed the construction of barrier-free facilities in March 1985. At that time, China Disabled Persons Welfare Foundation, Beijing Disabled Persons Association, and Beijing Architectural Design Institute jointly held a research meeting on disabled persons and social environment in Beijing, and issued a statement for disabled persons. The initiative to create a convenient living environment, in April of the same year, at the third session of the sixth session of the National People's Congress and the third session of the sixth session of the Chinese People's Political Consultative Conference, some deputies to the National People's Congress and members of the Chinese People's Political Consultative Conference put forward proposals and suggestions for the construction of special facilities for the needs of the disabled. In July 1986, the Ministry of Construction, the Ministry of Civil Affairs and the China Disabled Persons Welfare Foundation jointly compiled China's first "Code for Design of Urban Roads and Buildings for Disabled Persons (Trial)", which was promulgated and implemented in 1989. The construction of barrier-free facilities in developed countries such as the United States and Japan and in developed regions such as Hong Kong Later, accessibility not only served the 37 million people with disabilities in the United States, but benefited the entire population. The construction of barrier-free environment in the United States has multi-level legislative guarantees and has entered the field of scientific research and education: various barrier-free facilities have an all-round layout and are coordinated with architectural art, which can be called world-class. Many colleges and universities in the United States have established a specialization in barrier-free design.   While carrying out the construction and renovation of barrier-free facilities, Europe emphasizes that the construction of houses should also be barrier-free, that is, for the disabled and the elderly. In the late 1930s, Sweden and Denmark began to provide apartments for the elderly.   There are about 200 million disabled people in the Asia-Pacific region. In recent years, Japan, Malaysia, the Philippines, South Korea and other countries have developed relatively good barrier-free facilities. Japan's current barrier-free facilities are relatively popular, and the unified construction regulations formulated by the country include barrier-free design. When each building is completed, a special department will check whether the construction of barrier-free facilities complies with the regulations. In some public facilities, especially stores, different levels of barrier-free design are implemented according to the size of the building area. For example, for large and medium-sized commercial buildings with an area of ​​more than 1,500 square meters, it is stipulated that special parking lots, toilets, elevators, and unimpeded passage for wheelchair users should be provided for the disabled and the elderly.
    Read More
  • The Complete Guide to Portable Wheelchair Ramps: Choosing the Right Ramp for Home and Travel The Complete Guide to Portable Wheelchair Ramps: Choosing the Right Ramp for Home and Travel
    Jun 18, 2026
    The Complete Guide to Portable Wheelchair Ramps: Choosing the Right Ramp for Home and Travel Finding the right portable wheelchair ramp can make a world of difference for individuals with limited mobility. Whether you need to access a home entrance, load a wheelchair into a vehicle, or navigate a public space, a well-chosen ramp provides independence, safety, and peace of mind. In this guide, we will walk you through the key factors to consider when selecting a portable wheelchair ramp, including weight capacity, length, material, and design features. Why Choose a Portable Wheelchair Ramp? Unlike permanent installations, portable ramps for wheelchairs offer flexibility. They can be moved from one location to another, stored when not in use, and set up in seconds. This makes them ideal for: Home use — Overcoming steps at entrances, doorways, and patios Travel — Accessing RVs, vans, and temporary lodging Public venues — Schools, offices, and community centers that need temporary accessibility solutions Vehicle loading — Loading wheelchairs, scooters, or mobility devices into cars and vans Key Factors to Consider 1. Weight Capacity Always check the ramp's weight rating before purchasing. Choose a ramp that supports at least the combined weight of the wheelchair and its occupant. Most standard portable ramps support between 600 and 800 pounds. 2. Length and Slope The ramp length determines how steep the incline will be. The standard recommended slope ratio is 1:12 (for every inch of rise, you need 12 inches of ramp length). For example, a 6-inch step requires a 6-foot ramp. A shallower slope (1:8 or 1:6) is acceptable for lighter-use situations. To make this easier, measure the height of the step or threshold you need to overcome, then multiply by 12 to find the minimum ramp length in inches. 3. Material and Durability Aluminum is the most common material for portable ramps — and for good reason. It is lightweight, rust-resistant, strong, and easy to clean. Whether you choose a wheelchair aluminum ramp for house or a more compact design, aluminum provides long-lasting performance. Look for ramps with a non-slip surface, such as raised ridges or grip tape, to ensure safe use in wet conditions. 4. Track Width Portable ramps typically come in two styles: Single-track ramps — Narrower and lighter, designed for manual wheelchairs. Multi-fold ramps — Wider, providing a full-width platform for power wheelchairs and scooters. 5. Portability Features Look for ramps with built-in carrying handles, telescoping designs, or folding mechanisms. A lightweight design (under 15–20 lbs) makes a huge difference if you need to carry the ramp regularly. Top Applications for Portable Ramps Home Entryways A lightweight wheelchair ramp for house can solve accessibility challenges at front doors, garage entries, and sunken living rooms. These ramps are easy to position and remove as needed. Vehicle Access For van and SUV users, portable ramps allow quick loading and unloading of wheelchairs and scooters. Look for models with anti-slip surfaces and secure positioning features to prevent shifting during use. Stairs and Curbs Portable Wheelchair Ramps For Stairs are designed with a shorter, wider profile to bridge small curbs or single steps. They are often used in urban environments where full-length ramps are impractical. Thresholds For doorways with raised thresholds, a compact aluminum threshold ramp provides a smooth transition without requiring a full-size ramp. These are ideal for both interior and exterior doors. Safety Tips Check the ground surface — Always place the ramp on a stable, level surface. Use the ramp with a spotter — Especially when first learning to use a new ramp. Secure the ramp — Make sure the ramp ends rest firmly against both surfaces to prevent slipping. Inspect regularly — Check for cracks, bends, or worn non-slip surfaces and replace if needed. Follow the slope guidelines — A slope that is too steep is dangerous for both the user and the person assisting. Conclusion Investing in the right portable wheelchair ramp is a step toward greater independence and accessibility. By considering the weight capacity, length, material, and portability features, you can find a solution that fits your specific needs. Whether you need a ramp for daily home use, travel, or temporary situations, choose a high-quality Residential Wheelchair Ramp that meets safety standards and gives you confidence every time you use it.
    Read More
  • Choosing the Right Rollator Walker: A Complete Guide for Seniors and Caregivers Choosing the Right Rollator Walker: A Complete Guide for Seniors and Caregivers
    Jun 18, 2026
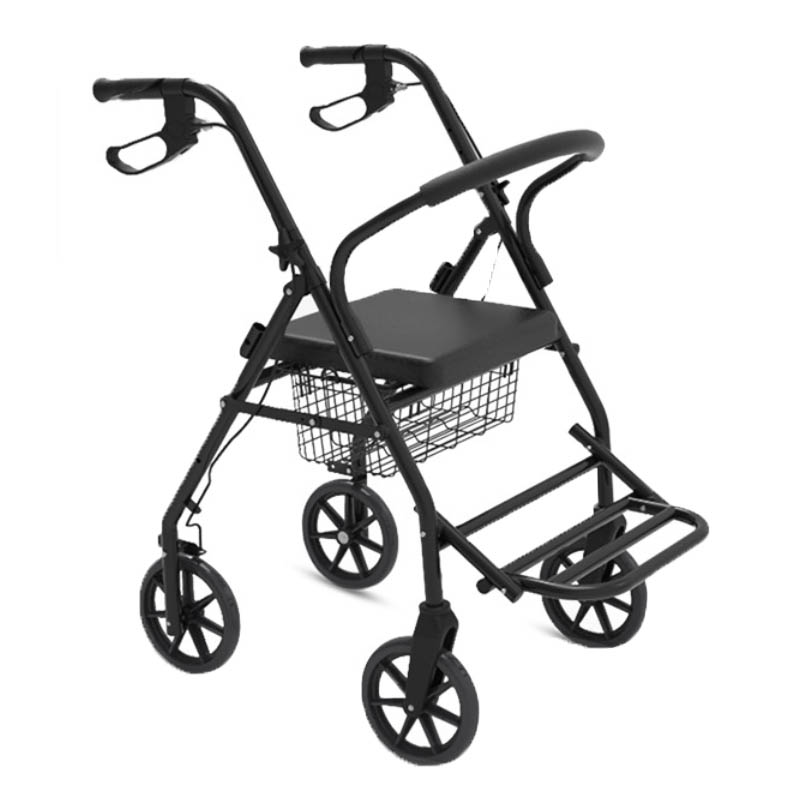
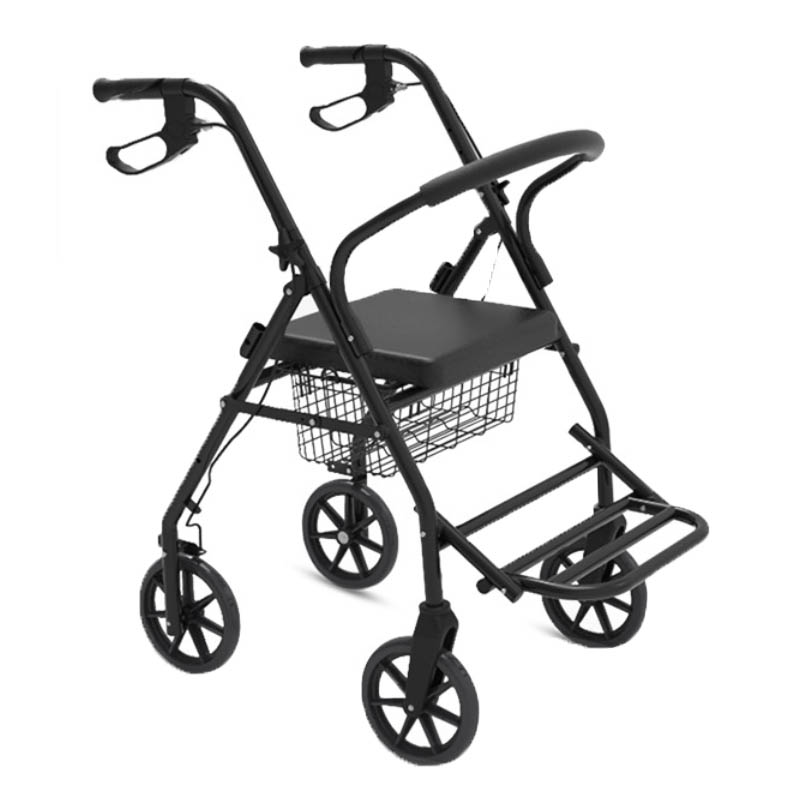
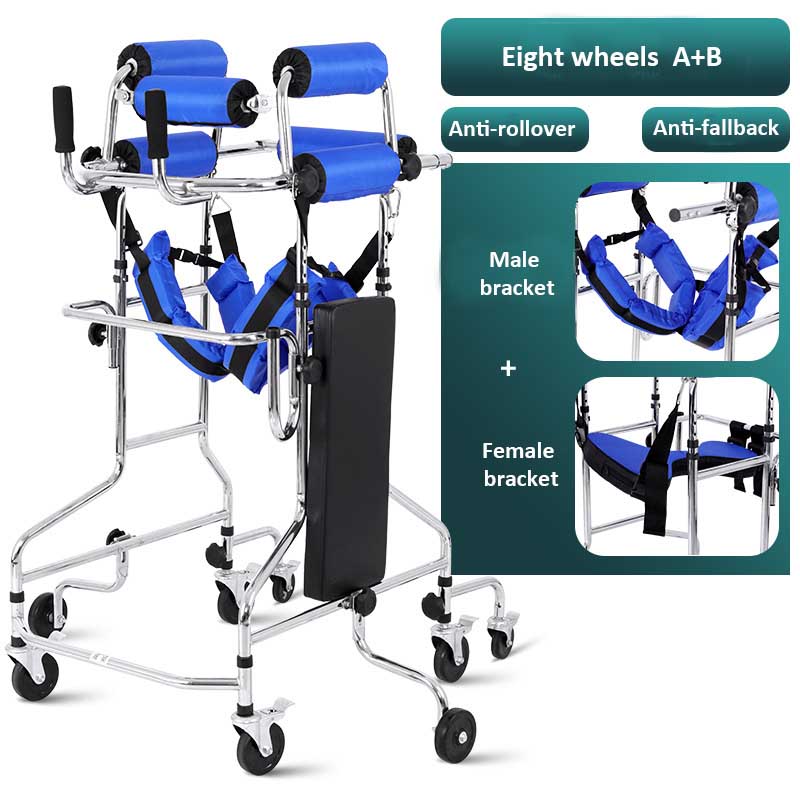
    Choosing the Right Rollator Walker: A Complete Guide for Seniors and Caregivers A rollator walker is more than just a mobility aid — it is a tool that restores independence, confidence, and freedom of movement. Whether you are a senior looking to stay active, a caregiver searching for the right equipment, or someone recovering from an injury, choosing the right rollator can make all the difference. In this guide, we cover everything you need to know about rollator walkers, including types, features, sizing, and how to match a rollator to your specific needs. What Is a Rollator Walker? A rollator is a walking aid with four wheels, handlebars, hand brakes, and often a built-in seat. Unlike a standard walker that requires lifting, a rollator rolls smoothly forward, allowing the user to walk naturally. Most models also include a storage pouch or basket underneath the seat for carrying personal items. Key Benefits of Using a Rollator Natural walking motion — No need to lift the device; just push and walk Built-in seating — Take a rest whenever needed, ideal for long outings Increased stability — Four points of contact provide excellent balance support Storage convenience — Carry belongings hands-free Indoor and outdoor use — Suitable for sidewalks, parks, shopping malls, and home Types of Rollator Walkers 1. Standard Rollator The most common type, featuring 4 wheels, foam or ergonomic handles, loop brakes, and a padded seat. Great for everyday use. 2. Lightweight Rollator Made from aluminum, these are significantly lighter (typically 10–15 lbs), making them easier to lift into a car or carry up stairs. A lightweight aluminum wheeled walkers for seniors is ideal for those who travel frequently. 3. Heavy-Duty Rollator Designed for users weighing 350–500 lbs. These have reinforced frames, larger wheels, and wider seats for extra comfort and stability. 4. Rollator with Back Support Some users need additional trunk support. A rollator walker with back support provides lumbar stability and is especially helpful for users with balance issues or recent surgery. 5. 3-Wheel Rollator More maneuverable in tight spaces but less stable than 4-wheel models. Best for indoor use where space is limited. How to Choose the Right Rollator Step 1: Measure the User Height — The handle height should align with the user's wrist when standing upright with arms relaxed. Most rollators adjust from 32 to 39 inches. Seat height — The user should be able to sit with feet flat on the floor and knees at a 90° angle. Seat width — Standard seats are 18–20 inches wide. Wider options are available for larger users. Step 2: Consider Weight Capacity Always choose a rollator that supports at least 20–30 lbs more than the user's weight. Standard models support 250–300 lbs, while heavy-duty options support 350–500 lbs. Step 3: Choose the Right Wheels Small wheels (6–7 inches) — Better for indoor use and smooth surfaces Large wheels (8–10 inches) — Better for outdoor terrain, curbs, and uneven pavement All-terrain wheels — Pneumatic or foam-filled tires for grass, gravel, and park paths Step 4: Check Brakes and Safety Features All rollators should have hand brakes that are easy to grip and operate. Many seniors benefit from brakes with an ergonomic or wrap design. Also check for: Parking brakes (locking the rollator in place when seated) Reflective elements for visibility A stable frame that doesn't wobble Step 5: Evaluate Portability If the user needs to transport the rollator frequently, look for a folding frame. A health care portable wheeled walkers with seat that folds compactly is easier to fit in car trunks and store at home. Top Uses for Rollators Daily Walking and Exercise A 4 wheeled walker with seat and brakes allows seniors to walk safely around the neighborhood, visit parks, and stay physically active without fear of falling. Shopping and Errands The built-in seat and storage basket make rollators ideal for trips to the grocery store or mall. Users can stop and rest anytime. Travel and Vacations A lightweight folding four wheeled walker rollator can be taken on airplanes, in RVs, or on road trips. They fold flat for easy storage. Post-Surgery Recovery After hip or knee replacement surgery, a rollator provides the support needed during the early stages of walking rehabilitation. Maintenance Tips Check brake cables regularly for wear Keep wheels clean and free of debris Tighten screws and bolts every few weeks Replace worn hand grips Store indoors to prevent rust and weather damage Conclusion A rollator walker can dramatically improve quality of life for seniors and individuals with limited mobility. By considering the user's height, weight, typical terrain, and daily activities, you can find the perfect rollator that combines comfort, safety, and convenience. Whether you need a lightweight model for travel or a heavy-duty rollator for daily use, choosing a high-quality rollator walker means investing in greater independence and peace of mind.
    Read More
  • The Complete Guide to Choosing a Commode Chair: Types, Features, and Buying Tips The Complete Guide to Choosing a Commode Chair: Types, Features, and Buying Tips
    Jul 06, 2026
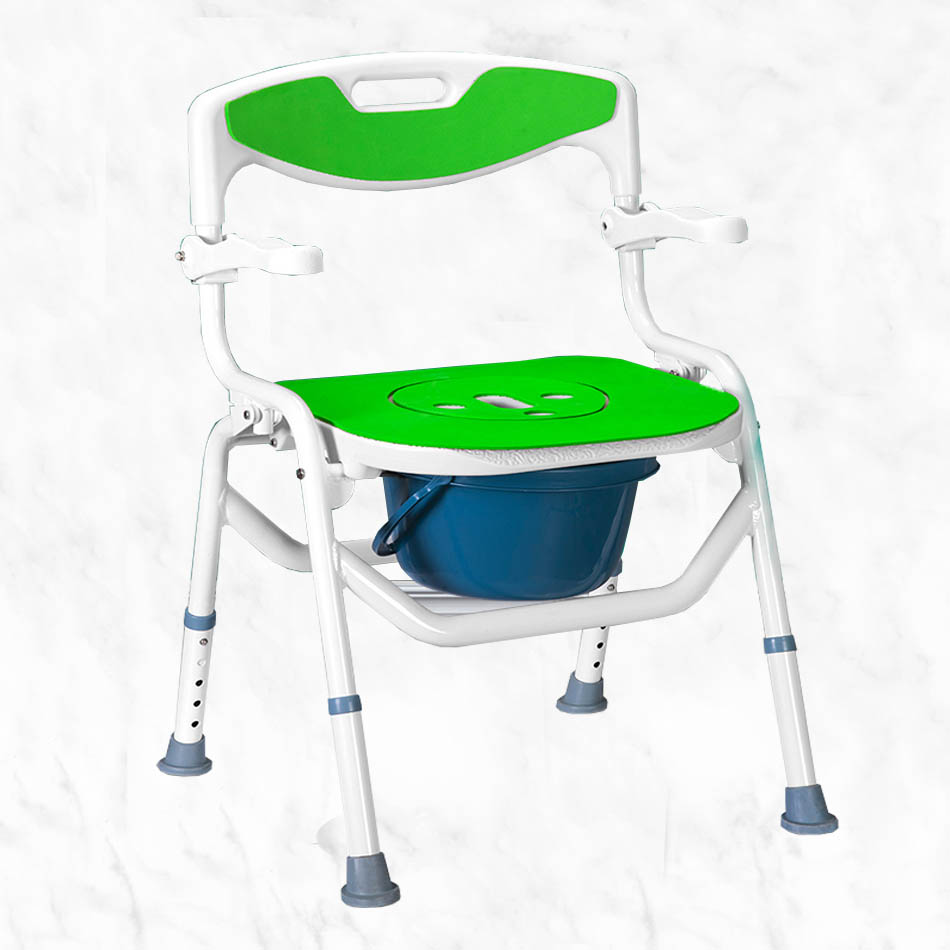
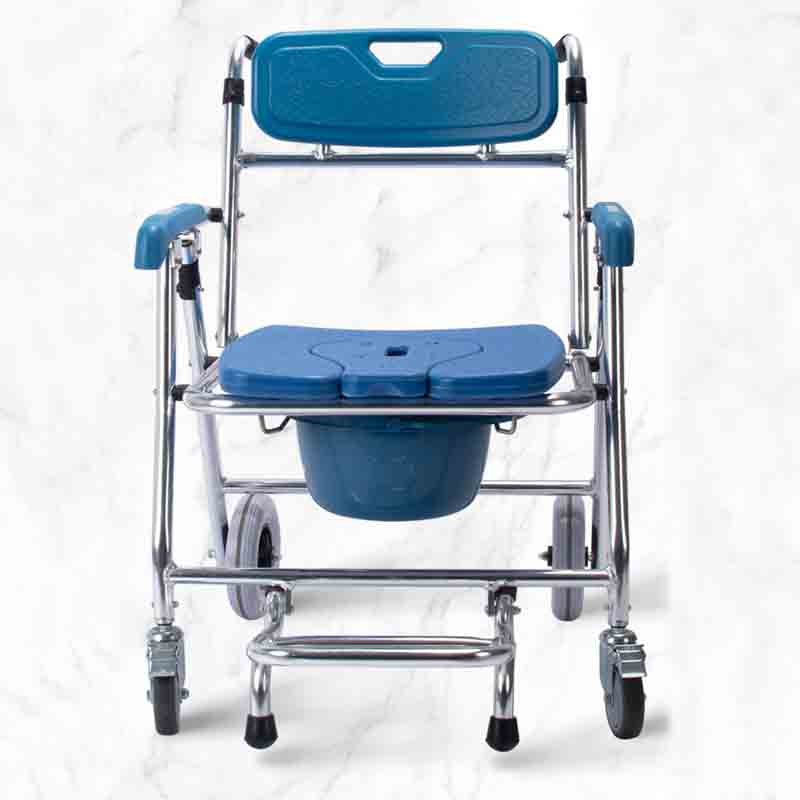
    A commode chair is an essential mobility aid for seniors, post-surgery patients, and individuals with limited mobility. Whether used as a bedside toilet, a shower commode, or a raised toilet seat replacement, choosing the right commode chair can significantly improve comfort, dignity, and safety. This guide covers everything you need to know — from types and materials to sizing, weight capacity, and maintenance. What Is a Commode Chair? A commode chair is a portable toilet chair that typically consists of a frame with armrests, a seat with an opening, and a removable bucket or pan underneath. Many models can also be placed directly over a standard toilet to serve as a raised toilet seat or used in the shower as a shower commode. Whether you need a simple bedside solution or a versatile 3-in-1 design, Commode Toilet Chairs for Handicapped and Seniors are available in a wide range of configurations to suit different needs. Key Benefits Bedside convenience — No need to rush to the bathroom at night Portable and lightweight — Easily moved between rooms or taken on trips Versatile use — Can function as a toilet chair, raised toilet seat, or shower chair Independence — Allows users to manage toileting with minimal assistance Safety — Sturdy frame with armrests provides support when sitting and standing Types of Commode Chairs 1. Standard Drop-Front Commode The most common type. Features a removable bucket with a drop-front pail cover for easy emptying. Ideal for bedside or indoor use. 2. 3-in-1 Commode Chair Versatile models that function as a bedside commode, raised toilet seat (placed over the toilet), and shower chair. A lightweight bedside commode shower chair is a great choice for those who need one device for multiple settings. Many models also work as a shower commode chair for over toilet, combining bathroom safety with toileting convenience. 3. Bariatric Commode Chair Heavy-duty models designed for users weighing 350–700 lbs. These feature reinforced steel frames, wider seats (20–22 inches), and higher weight capacities. 4. Rolling Commode Chair Includes locking casters for easy mobility. Ideal for users who need to be moved between rooms by a caregiver. 5. Reclining Commode Chair Offers a reclining backrest for users who need extra positioning support. Often used in hospitals and long-term care facilities. How to Choose the Right Commode Chair Step 1: Measure the Seat Height Seat height is critical for comfort and safety. The user should be able to sit with feet flat on the floor and knees at a 90-degree angle. Standard height: 17–19 inches Tall/Extra-tall: 20–25 inches (for taller users or post-surgery recovery) Adjustable height: Most models offer 3–5 height settings Step 2: Consider Weight Capacity Check the weight limit of the frame. Standard commodes support 250–350 lbs. Bariatric models support up to 700 lbs. Step 3: Choose the Right Seat Width Narrow seats (16–17 inches) fit smaller users. Standard seats (18 inches) fit most users. Wide seats (20–22 inches) are ideal for larger users. Step 4: Decide Between Stationary and Rolling Stationary models are lighter and more stable. Rolling models offer easier repositioning but require locking casters for safety during use. Step 5: Look for Easy-to-Clean Features A removable bucket with a splash guard makes emptying easier. Pail covers help contain odors. Some models feature tool-free disassembly for thorough cleaning. A folding portable commode toilet chair is especially convenient for travel and easy storage. Who Benefits Most from a Commode Chair? Seniors with limited mobility — Safer than walking to the bathroom at night Post-surgery patients — Essential after hip, knee, or abdominal surgery Individuals with disabilities — Provides independence for toileting Caregivers — Reduces physical strain when assisting with transfers Travelers and campers — Portable option for trips where bathroom access is limited A medical bedside commode shower chair offers the versatility that hospitals and home caregivers need — combining clinical durability with everyday comfort. Maintenance Tips Empty and clean the bucket daily with mild soap and water Disinfect the frame, armrests, and seat regularly Check rubber tips on legs for wear to prevent slipping Tighten screws and bolts weekly Replace the bucket if cracked or stained Conclusion A commode chair is a practical, dignity-preserving solution for anyone facing mobility challenges. By considering height, weight capacity, intended use, and ease of cleaning, you can find the perfect commode chair for your needs — whether at home, in a care facility, or on the go.
    Read More
  • The Complete Guide to Bathroom Safety for Seniors: Shower Chairs, Grab Bars, Raised Toilet Seats, and Essential Mobility Aids The Complete Guide to Bathroom Safety for Seniors: Shower Chairs, Grab Bars, Raised Toilet Seats, and Essential Mobility Aids
    Jul 08, 2026
    The Complete Guide to Bathroom Safety for Seniors: Shower Chairs, Grab Bars, Raised Toilet Seats, and Essential Mobility Aids The bathroom is one of the most hazardous rooms in the home for seniors and individuals with limited mobility. Wet floors, hard surfaces, and confined spaces create a perfect storm for slips and falls. According to the CDC, approximately 80% of falls in the home occur in the bathroom. The good news is that with the right safety equipment, most bathroom accidents are entirely preventable. This guide covers everything you need to know about bathroom safety — from shower chairs and grab bars to raised toilet seats and transfer benches — helping you create a safe, accessible bathroom for yourself or a loved one. Why Bathroom Safety Matters Bathrooms present unique challenges for seniors and people with mobility limitations: Wet and slippery surfaces — Water and soap create hazardous conditions on tile, vinyl, and fiberglass floors Confined spaces — Limited room makes maneuvering with walkers or wheelchairs difficult Frequent transitions — Getting in and out of the shower, on and off the toilet, and standing from a seated position all require balance and strength Hard surfaces — Falls in the bathroom are more likely to cause serious injury due to porcelain fixtures, tile floors, and sharp corners A well-equipped bathroom with proper safety aids can dramatically reduce fall risk and help seniors maintain independence in their daily routines. Shower Chairs and Bath Seats A shower chair is often the first piece of bathroom safety equipment families consider — and for good reason. Sitting while bathing eliminates the risk of falling on a wet shower floor and conserves energy for those who tire easily. Types of Shower Chairs Standard Shower Chairs — The most common option, featuring four legs with non-slip rubber tips and a plastic or aluminum seat. These are lightweight, affordable, and suitable for most users. A bathroom safety shower bench chair provides the stability needed for confident showering. Swivel Shower Chairs — These include a rotating seat that makes it easier for users to enter and exit the shower. The swivel mechanism allows the user to sit on the chair outside the shower, then rotate their legs into the shower area. A comfortable non slip swivel shower chair is ideal for caregivers assisting with transfers. Folding Shower Chairs — Designed for easy storage and portability. A health folding bathroom shower chair can be hung on a wall hook when not in use, keeping the shower floor clear. Bath Benches — These are longer seats that span the width of the bathtub, allowing the user to sit on the bench, swing their legs over the tub wall, and slide into position. A height adjustable bath bench stool is an excellent choice for users who prefer a wider, more stable seating surface. Transfer Benches — Half of the bench sits outside the tub and half inside, allowing the user to sit on the dry outer section first, then slide inward. This eliminates the need to step over the tub wall entirely. Key Features to Consider Weight capacity — Standard chairs support 250-350 lbs; heavy-duty models support up to 500 lbs Seat height adjustability — Legs that adjust from 14 to 20 inches accommodate users of different heights Non-slip feet — Look for suction cup feet or rubber tips that grip the shower floor securely Backrest — Provides additional support and security, especially for users with limited trunk control Armrests — Help with sitting and standing by providing leverage points Tool-free assembly — Makes installation and height adjustment simple Drainage holes — Prevent water pooling on the seat surface Who Benefits from a Shower Chair Seniors with reduced balance or strength Individuals recovering from hip, knee, or back surgery People with arthritis, Parkinson's disease, or multiple sclerosis Caregivers who need to assist with bathing Anyone who feels unsteady standing in the shower A medical swivel aluminum bath chair combines the corrosion resistance of aluminum with the convenience of a rotating seat, making transfers smoother for both user and caregiver. Grab Bars and Safety Rails Grab bars provide secure handholds for entering and exiting the shower, getting on and off the toilet, and navigating the bathroom safely. Unlike towel bars or soap dishes that are not designed to bear weight, properly installed grab bars are anchored into wall studs or reinforced backing and can support hundreds of pounds. Where to Install Grab Bars Inside the shower — On the wall opposite the shower controls, and on the side wall for leaning support At the shower entrance — One vertical bar or a combination of vertical and horizontal bars to help with stepping over the tub wall Next to the toilet — On the side wall and/or in front, positioned to assist with sitting and standing Near the bathroom entrance — For steadying during transitions Inside a walk-in shower — Along the entry and at the shampoo niche area Types of Grab Bars Straight Bars — Simple and effective. Available in lengths from 12 to 36 inches. Standard diameter is 1.25 inches for optimal grip. Angled or Curved Bars — Provide multiple grip positions and can fit corner installations. Ideal for small spaces. Suction Cup Grab Bars — Temporary solutions for travel or rental homes. Not as secure as permanently mounted bars — never rely on suction bars for full weight support. Toilet Safety Rails — Freestanding or wall-mounted rails that frame the toilet, providing armrests for sitting and standing. These are especially helpful for users who need leverage but don't want to install multiple grab bars. Installation Tips Install grab bars at a height of 33-36 inches from the floor (toilet area) or 34-38 inches (shower area) Always mount into wall studs or use heavy-duty toggle bolts for hollow wall anchors Use stainless steel or brass bars for rust resistance in wet environments Hire a professional installer if you're unsure about wall construction Raised Toilet Seats and Commode Chairs Toileting is one of the most physically demanding bathroom tasks for seniors and people with limited mobility. Standard toilet heights (14-15 inches) require significant knee and hip flexion to sit down and stand up. A raised toilet seat or commode chair addresses this by increasing seat height and providing arm support. Raised Toilet Seats A raised toilet seat fits over your existing toilet bowl, increasing seat height by 2 to 4 inches. This reduces the distance you need to lower and raise your body, making sitting and standing easier and safer. Standard raised seats — Add approximately 2 inches of height Extra-tall raised seats — Add 3.5 to 4 inches, ideal for taller users or those with hip or knee limitations Hinged models — Flip up for easy cleaning and allow the regular toilet seat to be used Bedside Commode Chairs A commode chair serves dual purposes — it can be placed over a toilet as a raised toilet seat with armrests, or used as a standalone bedside toilet with a removable bucket. Commode Toilet Chairs for Handicapped and Seniors are especially useful for: Post-surgery recovery when reaching the bathroom is difficult Nighttime use for seniors with frequent bathroom trips Travel and camping where bathroom access is limited Care situations where the user cannot easily transfer to a standard toilet Features of a Good Commode Chair Tool-free height adjustment — Legs should adjust in 1-inch increments from 17 to 22 inches Padded seat — Increases comfort for extended sitting Removable bucket with splash guard — Makes emptying cleaner and easier Drop-front pail cover — Accessible without removing the entire bucket Flip-up or removable armrests — Facilitates side transfers Over-toilet positioning — Wheel clearance that fits around standard toilets Lightweight aluminum frame — Easier to move and reposition than steel frames A medical bedside commode shower chair with wheels combines toileting, showering, and mobility in one versatile unit, ideal for users who need assistance in multiple settings. A shower commode chair for over toilet works well for users who want a single solution for both showering and toileting. Bathroom Safety Mats and Non-Slip Solutions Beyond major equipment, small additions make a big difference in bathroom safety: Non-Slip Mats — Place adhesive non-slip strips or mats inside the shower or bathtub. These provide traction underfoot even when wet. Bathroom Floor Mats — Place absorbent, non-slip mats on the floor outside the shower and in front of the sink and toilet. Choose mats with a rubber backing that grips the floor. Shower Caddies and Organizers — Keep soaps, shampoos, and other essentials within easy reach to avoid bending or stretching. Night Lights — Plug-in night lights illuminate the path to the bathroom for nighttime trips. How to Create a Comprehensive Bathroom Safety Plan Step 1: Assess the Bathroom - Measure door width to ensure wheelchair or walker clearance (minimum 32 inches) - Check floor surfaces — are they non-slip when wet? - Evaluate grab bar placement near shower, toilet, and entry - Measure toilet height (standard 14-15 inches) - Measure shower or tub step-over height Step 2: Prioritize Equipment Needs - Essential — Shower chair or bench, grab bars near toilet and shower, non-slip mats - Important — Raised toilet seat, handheld showerhead, toilet safety rails - Consider — Transfer bench, bedside commode, shower stool with backrest Step 3: Install and Configure - Have grab bars professionally installed into wall studs - Adjust shower chair legs so the user sits with feet flat on the floor and knees at 90 degrees - Position raised toilet seat so the user can stand with minimal effort - Set up the commode chair in the bedroom if needed for nighttime use Step 4: Educate Caregivers and Users - Demonstrate how to use grab bars correctly - Practice transfers with the shower chair or transfer bench - Review emergency procedures — ensure someone checks on the user during bathing Maintenance Tips Clean equipment weekly — Use mild soap and water. Avoid harsh chemicals that can degrade plastic or rubber components. Check rubber tips and suction cups — Replace if worn or cracked to prevent slipping. Tighten bolts and screws — Monthly inspection prevents loosening over time. Inspect grab bar anchors — Confirm bars are still securely mounted to wall studs. Replace non-slip mats annually — Traction wears down with use and cleaning. Lubricate swivel mechanisms — Keep rotating seats smooth and quiet. Conclusion Creating a safe bathroom environment is one of the most impactful steps you can take to protect seniors and individuals with mobility challenges. By combining a stable shower chair, securely mounted grab bars, a raised toilet seat or commode chair, and non-slip surfaces, you can dramatically reduce fall risk while preserving dignity and independence. Start with the most critical items — a quality shower chair and grab bars — and build from there based on the user's specific needs. Every piece of bathroom safety equipment is an investment in confidence, safety, and quality of life.
    Read More
  • The Complete Guide to Choosing Walking Canes, Crutches, and Walking Sticks: Types, Sizing, and Safety Tips The Complete Guide to Choosing Walking Canes, Crutches, and Walking Sticks: Types, Sizing, and Safety Tips
    Jul 21, 2026
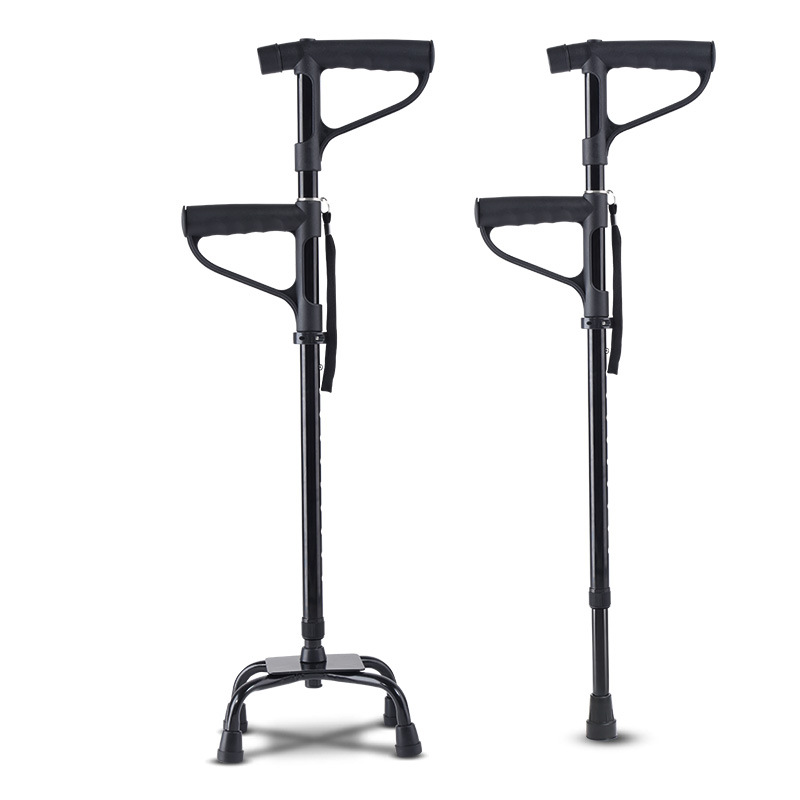
    The Complete Guide to Choosing Walking Canes, Crutches, and Walking Sticks: Types, Sizing, and Safety Tips For millions of seniors and individuals recovering from injury or surgery, a walking cane, crutch, or walking stick is more than just a mobility aid — it is a tool that restores confidence, independence, and freedom of movement. But with so many types available, choosing the right one can be overwhelming. This guide covers everything you need to know about walking canes, crutches, and walking sticks — including types, sizing, handle styles, materials, and safety tips — helping you find the perfect support device for your needs. Why the Right Walking Aid Matters Using the wrong walking aid — or one that is poorly fitted — can actually increase your risk of falling rather than reduce it. A properly selected and adjusted cane or crutch: Reduces joint pain — Takes pressure off hips, knees, and ankles Improves balance — Provides a third or fourth point of contact with the ground Increases confidence — Makes walking feel safer, especially on uneven surfaces Prevents falls — Offers stability when navigating stairs, curbs, and slippery floors Supports recovery — Helps maintain mobility during rehabilitation after surgery or injury Types of Walking Canes Walking canes are the most common and least intrusive walking aids. They are ideal for individuals who need minimal support — primarily for balance rather than weight bearing. Standard C-Cane The classic single-point cane with a curved handle. It offers the lightest support and is best for users who only need occasional balance assistance. Offset Cane Features an angled handle that aligns the user's weight directly over the shaft. This provides better weight distribution and reduces hand strain. Quad Cane Has a four-point base for maximum stability. Unlike single-point canes, a quad cane can stand upright on its own and is recommended for users with more significant balance concerns. Folding Cane Designed for portability, folding canes collapse into sections for easy storage in a bag or purse. A lightweight elderly aluminum walking cane is an excellent choice for seniors who want reliable support without extra weight. Types of Walking Sticks Walking sticks differ from canes primarily in their straighter shaft and often more decorative design. Standard Walking Stick A straight shaft with a handle at the top and a rubber tip at the bottom. Available in wood, aluminum, and carbon fiber. Telescopic Walking Stick Adjustable in height, making it easy to fit multiple users or adapt to different footwear. A telescopic walking stick with comfortable handle is ideal for travel, as it can be shortened to fit in luggage. Height Adjustable Walking Stick Features a push-button mechanism that allows precise height adjustment in 1-inch increments. A height adjustable aluminum walking stick combines lightweight durability with easy customization. Types of Crutches Underarm (Axillary) Crutches The most common type, placed under the armpits with handgrips at mid-height. Most often used for temporary injuries such as sprains, fractures, or post-surgery recovery. Forearm (Lofstrand) Crutches Feature a cuff that wraps around the forearm with a handgrip below. Often preferred by users who need long-term support. Platform Crutches Include a horizontal platform for the forearm to rest on instead of a handgrip. Designed for users with arthritis or hand injuries. Handle Styles Crook Handle — The classic curved handle. Traditional and familiar but can put pressure on the palm during extended use. T-Handle — Straight handle shaped like a "T." Offers good grip but less comfortable for users with arthritis. Ergonomic Handle — Contoured to fit the natural shape of the hand. Reduces pressure points and wrist strain. Offset Handle — Positions the user's weight directly over the shaft. Maximizes weight-bearing support and reduces hand fatigue. Swivel Handle — Rotates to adapt to the user's natural walking motion, reducing wrist strain. Materials Aluminum — Lightweight, durable, and rust-resistant. The most common material for canes and walking sticks. Wood — Classic appearance with natural shock absorption. Heavier than aluminum but preferred for its traditional look. Carbon Fiber — Ultralight and extremely strong. The lightest option available, but also the most expensive. How to Choose the Right Height Proper sizing is critical for safe and comfortable use of any walking aid. For Canes and Walking Sticks: 1. Stand upright wearing your normal walking shoes 2. Let your arms hang naturally at your sides 3. The top of the cane should align with the crease of your wrist 4. When holding the cane, your elbow should be bent at approximately 15-20 degrees Most adjustable canes fit heights from approximately 5'0" to 6'4". For Crutches: - Underarm crutches — The top should sit 1-2 inches below your armpit. The handgrip should align with your wrist crease. - Forearm crutches — The cuff should sit approximately 1 inch below the back of your elbow. Which Hand Should You Use? A common misconception is that a cane should be held in the hand opposite the injured leg. In fact, holding the cane in the hand opposite the weak or painful leg is the most biomechanically efficient way to walk. This distributes weight evenly across the body and reduces stress on the affected joint. Safety Tips Check the rubber tip (ferrule) regularly — Replace when worn down to ensure traction Keep the cane or crutch clean — Wipe down the shaft and handle weekly Inspect for damage — Look for cracks, bends, or loose hardware Replace worn handgrips — Ensure a secure, comfortable grip at all times Use on dry surfaces when possible — Be extra cautious on wet or icy ground Store properly — Keep in a dry place when not in use to prevent corrosion Consider ice tips — For winter walking, attach ice-pick tips for traction on snow and ice Conclusion Choosing the right walking cane, crutch, or walking stick depends on your specific needs — the level of support required, how often you will use it, and your personal comfort preferences. A single-point cane offers the lightest support and is ideal for balance, while a quad cane or crutches provide more substantial weight-bearing support. Take the time to get the correct height measurement, choose a handle style that feels comfortable in your hand, and select a material that matches your lifestyle. The right walking aid can make a meaningful difference in your daily mobility, confidence, and quality of life.
    Read More
  • The Complete Guide to Threshold Ramps: Safe Doorway Transitions for Wheelchairs, Walkers, and Seniors The Complete Guide to Threshold Ramps: Safe Doorway Transitions for Wheelchairs, Walkers, and Seniors
    Sep 08, 2026
    The Complete Guide to Threshold Ramps: Safe Doorway Transitions for Wheelchairs, Walkers, and Seniors A doorway threshold that rises even half an inch above the floor is easy to ignore — until a wheelchair front wheel catches on it, a walker leg snags, or an older adult loses balance while stepping over. For people with limited mobility, these small level changes between rooms and at building entrances are among the most common everyday obstacles in the home. A threshold ramp solves the problem by creating a smooth, gradual transition between two floor levels. This guide explains what threshold ramps are, how to measure your doorway, and how to choose between fixed, modular, and portable designs so you can move through your home safely and independently. HOT TOPICS #ThresholdRamp #WheelchairAccessibility #DoorwaySafety #HomeModification #ElderlyMobility 1Why Doorway Thresholds Are a Hidden HazardHOT#DoorwayFallHazard Most falls happen not on stairs but on flat ground during routine movements — and raised thresholds are a classic trip point. A threshold forces the user to lift the foot or wheel over an edge, which requires balance, strength, and precise foot placement. For wheelchair users, even a small lip can stop the chair completely or tip it forward; for walker or rollator users, the front legs can catch and cause a stumble. Users of wheelchairs, rollators, and lightweight aluminum wheeled walkers for seniors all face the same risk whenever a floor level changes. Thresholds are found in many places: ●Exterior doors and sliding patio doors with weather sills ●Garage-to-house entryways and sunken living rooms ●Transitions between tile, wood, and carpeted floors ●Bathroom and laundry doorways where flooring heights change ●Balconies, porches, and mobile home or RV entrances A properly selected aluminum threshold ramp removes the edge entirely, letting wheels roll and feet step without the sudden change in level. 2What Is a Threshold Ramp?HOT#ThresholdRampBasics A threshold ramp is a low-rise ramp designed for small height differences — typically from about half an inch up to two or three inches. Unlike a full wheelchair ramp, which may be several feet long to reach a raised entrance, a threshold ramp is compact enough to fit inside a doorway or across a single step while still providing a safe, gentle slope. While portable mobility aluminum ramps for accessibility are sized for taller steps and vehicle access, threshold ramps are made for the low rises found at doorways. These ramps support not only wheelchairs but also walkers, rollators, mobility scooters, and people who simply find high thresholds difficult to step over. Many models feature beveled edges on both ends so there is no new lip to trip on, and a non-slip surface so the ramp stays safe when wet. 3Measure Your Doorway FirstHOT#RampSizeCalculator Rise height. Use a ruler or tape measure to find the vertical difference between the lower floor and the top of the threshold. This determines the minimum ramp length you need. Width. Measure the doorway or path opening. The ramp should be at least as wide as the user's wheel track or the walker's leg span — and ideally wide enough for the whole doorway so the user does not have to aim precisely. Slope. The gentler the slope, the easier and safer the ramp is to use. Quick rule: aim for a rise-to-length ratio of about 1:12 — for every inch of rise, allow about 12 inches (one foot) of ramp length. For example, a 1-inch threshold calls for roughly a 1-foot ramp. Many compact threshold ramps use steeper slopes of 1:8 or less because the rise is so small; these are acceptable for low-speed crossings, but the gentlest slope your space allows is always the best choice. Also check that the door can still swing fully. If the ramp sits in the doorway, confirm there is enough clearance under the door so it does not scrape the ramp surface. 4Fixed, Modular, or Portable?#RampTypes Threshold ramps come in three basic styles, and the right choice depends on where and how often you need it. One-piece fixed threshold ramps. A solid aluminum threshold ramp that is screwed, bolted, or epoxied in place. Best for permanent installations at exterior doors, garage entries, and other spots used every day. Fixed ramps stay exactly where you put them, so there is no risk of shifting during use. Modular and adjustable threshold ramps. Designed to fit unusual or custom thresholds. Modular aluminum threshold ramps can be combined or adjusted to match the exact rise and width of your doorway, which makes them useful for older homes where thresholds vary in height. An adjustable transitions aluminum threshold ramp can be fine-tuned to sit flush on both sides, eliminating gaps that could catch a wheel. Portable threshold ramps. Lightweight and tool-free, these are moved from door to door or packed for travel, rentals, and visits to family members' homes. Choose a portable model with a carrying handle and a non-slip top surface. For most permanent home doorways, a fixed or modular aluminum threshold ramp gives the best combination of stability, durability, and a clean look. For renters or frequent travelers, a portable ramp is the practical alternative — and the wider family of portable ramps for wheelchairs offers options for every situation. 5Aluminum Is the Standard Material#AluminumRampMaterial Most quality threshold ramps are made from aluminum — and for good reason. Aluminum is strong enough to support a wheelchair, scooter, and user without flexing, yet light enough to move and install easily. It resists rust and corrosion, which matters at exterior doorways exposed to rain, snow, and humidity. High-quality aluminum ramps are finished with a non-slip surface, such as raised ridges or a slip-resistant coating, so wheels and shoes grip even when the ramp is wet. Rubber and plastic threshold ramps are also available. Rubber models can conform to slightly uneven surfaces and are inexpensive, but they generally offer lower weight capacities and can wear or crack over time. For daily use by a wheelchair or walker user, an aluminum threshold ramp is the more durable and dependable investment. 6Indoor and Outdoor Placement Tips#IndoorOutdoorRamps Outdoor doorways. Look for an aluminum ramp with a non-slip surface and drainage so water does not pool on top. Beveled edges should sit flush against both the ground and the threshold to keep rain from seeping underneath. If the doorway is covered, the ramp will stay drier and last even longer. Indoor transitions. Between hard floors and carpet, or at bathroom entries, choose a low-profile ramp so the door can close and the change in level is barely noticeable. Indoor ramps carry less weather exposure, but a non-slip surface still matters for safety in rooms where floors may get wet. Weight capacity. Check the rated load of the ramp and choose one that comfortably supports the combined weight of the user plus their wheelchair or walker. A caregiver may also step or lean on the ramp while assisting, so a little extra margin is wise. 7Installation and Safety Tips#RampInstallationSafety 1Clean both surfaces so the ramp sits flat, then position it squarely at the threshold. 2Confirm both ends are flush. If the ramp rocks or leaves a gap, choose an adjustable model or add the supplied shims. 3Secure permanent ramps with screws or bolts through the pre-drilled holes. Portable ramps should be checked before each use to make sure they have not shifted. 4Test the door swing before finalizing — the door should open and close without scraping the ramp. 5The first time a wheelchair user crosses, have a helper spot them and roll slowly at a slight angle if needed. 6If the rise is greater than about two to three inches, or the doorway leads onto a full flight of steps, a threshold ramp is not enough — choose a longer solution such as Portable Wheelchair Ramps For Stairs, which is sized for the full rise instead. 8Maintenance#RampMaintenance An aluminum threshold ramp needs very little care. Occasionally sweep or rinse away dirt and debris, check that mounting screws remain tight, and inspect the non-slip surface for wear. In winter, keep the ramp clear of ice and snow. With basic care, a quality aluminum threshold ramp will provide smooth, safe transitions for many years. ★Final Takeaway#ThresholdRampGuide Doorway thresholds should not be barriers. A well-chosen threshold ramp turns a frustrating lip into a smooth transition, protecting wheelchair users, walker users, and older adults from trips and falls while making every room in the home easier to reach. Measure your rise and width, match the ramp style to your doorway, and choose aluminum for durability — then enjoy the confidence of moving through your home without obstacles.
    Read More
  • The Complete Guide to Mobility Scooter Ramps: Vehicle Loading, Storage, and Home Access The Complete Guide to Mobility Scooter Ramps: Vehicle Loading, Storage, and Home Access
    Sep 08, 2026
    The Complete Guide to Mobility Scooter Ramps: Vehicle Loading, Storage, and Home Access A mobility scooter opens up the world — but only if you can get it out the door, up a curb, and into a vehicle. Because scooters are heavier and wider than manual wheelchairs, they need ramps designed for their weight, wheelbase, and turning style. The right ramp makes loading and everyday access safe; the wrong one can be frustrating or even dangerous. This guide covers how to choose a mobility scooter ramp for vehicle loading, storage, and home access, with practical advice on measuring your scooter, ramp types, slopes, and securing the scooter during transport. HOT TOPICS #MobilityScooterRamp #VehicleLoadingRamp #ScooterTravel #VanAccessibility #HomeMobility 1Why Mobility Scooters Need Dedicated RampsHOT#ScooterRampBasics Mobility scooters are much heavier than manual wheelchairs. A typical 3-wheel or 4-wheel scooter can weigh 200 to 400 pounds or more, and the rider adds additional weight. Scooter wheels are also positioned differently from wheelchair wheels, with a wider turning radius and limited ground clearance at the front. These differences matter on ramps. A ramp built for a lightweight manual wheelchair may flex, slide, or be too narrow for a scooter. A dedicated scooter ramp is rated for higher loads, wide enough for the scooter's wheel track, and long enough to keep the front of the scooter from scraping on steeper climbs. 2Scooter Ramps vs Wheelchair Ramps: Key DifferencesHOT#ScooterVsWheelchair ●Weight capacity — Scooter ramps are rated for the scooter plus rider, often 600 pounds or more. ●Width — Scooters have wider wheel tracks than wheelchairs, so the ramp surface must be wide enough for both rear wheels. ●Length and slope — Scooters climb best on gentle slopes; steep ramps can tip a scooter backward or catch the front on the edge. ●Surface and edges — Look for a non-slip surface and raised side edges or curbs to keep the scooter centered. ●Portability — Loading ramps for vehicles fold or telescope for storage in the trunk. Scooter ramps come in the same material families as portable mobility aluminum ramps for accessibility, but sized and rated for heavier loads. 3Measure First: Scooter Weight, Width, and Load HeightHOT#ScooterRampSizing Before choosing a ramp, write down three numbers: ●Total weight — scooter weight plus the heaviest expected rider (and any cargo). Choose a ramp rated above this total; a comfortable safety margin is 1.5 times the combined weight. ●Wheel track width — measure the distance between the outside edges of the rear wheels. The ramp must be at least this wide, ideally with a little extra room on each side. ●Load height — for vehicle loading, measure the height from the ground to the cargo floor or trunk opening, and the width of the opening itself. These numbers determine both the length and style of ramp you need. 4Types of Scooter Ramps#ScooterRampTypes Full-width folding ramps. These open into a single wide platform and fold into two or more sections for storage. They are the most stable option for scooters because both wheels stay on one continuous surface. A Portable Aluminum Scooter Ramp with a full-width design is the easiest choice for loading and everyday home access. Suitcase-style single-track ramps. These fold into a compact suitcase shape and split into two separate tracks, one for each wheel. They are lighter and store in small spaces, which makes them popular for travel, but the scooter rider must line up each wheel precisely, which takes practice. Telescopic and adjustable ramps. These extend or adjust to fit different heights and storage spaces, giving one ramp more flexibility across vehicles and situations. For most scooter owners, a full-width folding ramp is the best balance of safety and convenience, while a suitcase-style ramp suits travelers who need maximum portability. 5Vehicle Loading: Trunk, SUV, and Minivan Solutions#ScooterVehicleLoading Loading a scooter into a car is one of the most common needs — and the most common source of mistakes. Measure the height of the trunk or cargo opening and choose a ramp length that keeps the slope gentle. A ramp that is too short creates a steep angle, which can scrape the scooter's front or make the rear wheels lose traction. For hatchbacks and SUVs, a full-width folding ramp laid from the ground to the cargo floor works well. For taller vehicles, a longer ramp is safer. A Minivan wheelchair ramp 5ft length is a popular choice because it reaches the cargo floor of most minivans and full-size SUVs while keeping the slope manageable. For taller hatchbacks and crossovers, a 6ft portable mobility aluminum wheelchair ramp keeps the climb gentler. Always load and unload on level ground, with the vehicle in park and the parking brake engaged. Have a second person steady the scooter the first few times, and never drive up a ramp while seated on a scooter that is too fast for control — creep forward slowly or use the lowest speed setting. 6Around the Home: Thresholds, Steps, and Curbs#ScooterHomeAccess Scooters also need help around the home. A low threshold or single step can stop a scooter completely because the front wheels have little clearance. At doorways and porches, use a low-rise threshold ramp or a short portable ramp that bridges the step, keeping the approach straight. For small curbs and single steps, check the scooter's ground clearance first — if the front of the scooter is low, even a modest slope can scrape. When in doubt, choose a longer, gentler ramp or an aluminum wheelchair loading ramp rated for the scooter's weight. 7Slope, Weight Capacity, and Securing Rules#RampSafetyRules ●Keep the slope gentle. As a general rule, aim for about 1:12 (one foot of ramp length per inch of rise). Scooters can manage somewhat steeper short ramps, but gentler is always safer for the rider and the machine. ●Check the rated capacity. The ramp's weight rating should exceed the combined weight of scooter and rider, ideally by a clear margin. ●Center the scooter. On full-width ramps, ride in the center; on track ramps, align each wheel carefully before climbing. ●Secure during transport. Once the scooter is in the vehicle, engage its brake or power off, then use ratchet straps or tie-downs to keep it from rolling. Never rely on the scooter's own brake alone while driving. ●Inspect before each use. Check for cracks, bent edges, worn non-slip surfaces, and loose hinge pins, and replace any damaged ramp immediately. 8Maintenance and Safety Checklist#RampMaintenanceChecklist 1Wipe the ramp clean after use, especially after loading in wet or muddy conditions. 2Check hinge points and locks on folding and telescopic ramps regularly. 3Confirm the non-slip surface still provides grip; clean off oil, sand, or debris. 4Store the ramp dry, out of direct sun when possible, to extend the life of rubber parts. 5Practice loading with a helper at home before you need to do it alone away from home. ★Final Takeaway#ScooterRampGuide A mobility scooter is only as useful as its access. With a ramp matched to your scooter's weight, width, and your vehicle's load height, you can drive to appointments, visit family, and enjoy outings with confidence. Measure carefully, choose a full-width or purpose-built scooter ramp, keep slopes gentle, and always secure the scooter for transport — then the world stays within reach.
    Read More
  • The Complete Guide to Shower Chairs and Bath Seats: Choosing the Right Bathroom Safety Seat for Seniors and Caregivers The Complete Guide to Shower Chairs and Bath Seats: Choosing the Right Bathroom Safety Seat for Seniors and Caregivers
    Sep 16, 2026
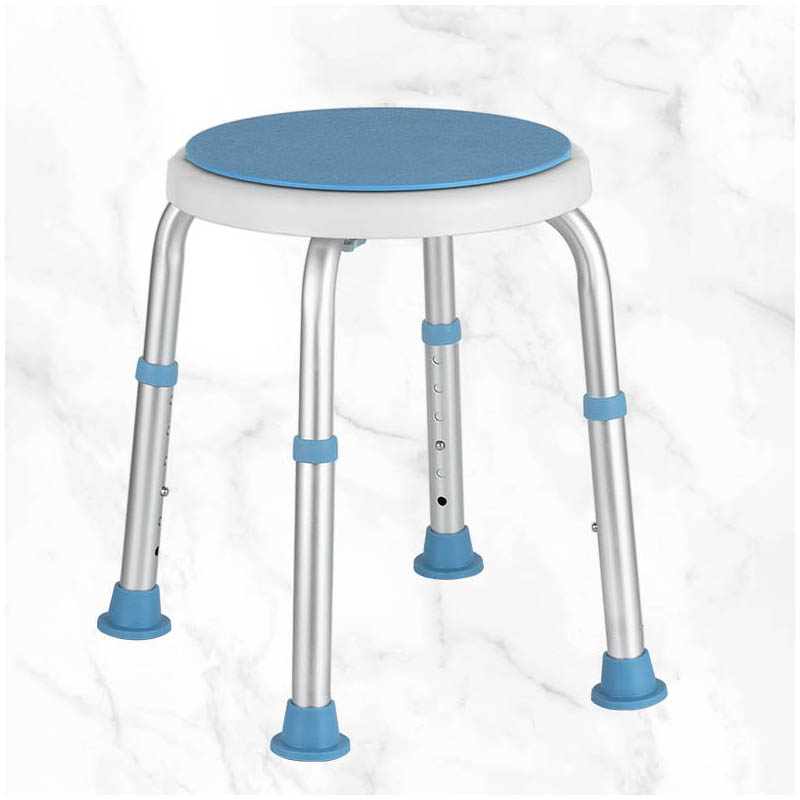
    The Complete Guide to Shower Chairs and Bath Seats: Choosing the Right Bathroom Safety Seat for Seniors and Caregivers Bathrooms are the most dangerous room in the house. Wet tile, hard edges, and the step over a tub wall turn a simple shower into the place where older adults most often fall. For anyone with limited balance, arthritis, or a recent surgery, standing to wash is the riskiest part of the day — and it is also the easiest part to fix. A shower chair, shower stool, or bath bench gives the bather a stable place to sit, keeps both hands free, and removes the balance challenge completely. This guide explains how shower chairs, shower stools, tub benches, swivel seats, and shower commode chairs differ, and how to choose the right type, size, material, and weight rating for your bathroom. HOT TOPICS#ShowerChairGuide#BathSeatBuyingGuide#BathroomSafety#SeniorFallPrevention#BathroomAccessibility 1Why Bathroom Seating Changes EverythingHOT#BathroomSeatingBasicsA seated shower removes the single riskiest movement in the house: standing on a wet, slippery floor while your eyes are closed and your hands are busy. A waterproof shower seat for the elderly gives the bather a fixed place to sit, which means less fatigue and far less chance of a slip. Seating also makes bathing easier for the caregiver. It lowers the reach needed to help with the back, feet, and hair, and keeps the bather at a comfortable working height instead of standing over them. ●Limited balance or dizziness — anyone who feels unsteady on wet tile, even occasionally.●Arthritis or joint pain — a seat removes the need to stand and balance through a whole shower.●Post-surgery recovery — hip, knee, and back operations make standing in a shower risky for weeks.●Caregivers — a seated bather is easier and safer to assist, and easier to reach.2Shower Chair vs Shower Stool vs Bath BenchHOT#ShowerChairVsBathBenchThese three names are often used interchangeably, but they solve different bathroom layouts. ●Shower chair — a seat with a backrest, and often armrests, that stands on the floor of the shower or tub. Best for anyone who tires easily or needs back support while washing. ●Shower stool — a backless, height adjustable stool on a compact footprint. Best for small stalls where a full chair will not fit, or for users who only need somewhere to rest. ●Bath bench / tub bench — a wider seat that spans both tub walls so the bather sits outside the tub and swings their legs over. Best for a standard bathtub, because it removes the step-in entirely. If the bathroom has a walk-in shower, start with a chair or stool. If it has a tub, a bath bench or transfer bench is usually the safer choice.3Sizing: Seat Height, Width, and Weight CapacityHOT#ShowerChairSizingThree numbers decide whether a seat is comfortable or useless: ●Seat height — feet should rest flat on the floor with hips and knees roughly level, usually 17 to 19 inches. An adjustable-height chair lets you fine-tune this, and taller legs suit users who struggle to rise from a low seat. ●Seat width and depth — wide enough to sit down without aiming, shallow enough that the backrest still supports the lumbar area. Check that the chair clears the shower door swing and any existing grab bars. ●Weight capacity — choose a rating above the heaviest expected user with a clear margin, and check that the frame and feet are rated together, not just the seat. ●Shower floor and drain — check the base leaves the drain clear so water does not pool around the feet.4Stability: Non-Slip Feet, Arms, and Weight Distribution#ShowerSeatStabilityStability comes from the base, not the seat. Look for wide rubber tips with a large contact area, a low seat height, and splayed legs that keep the center of gravity inside the footprint. On textured tile, plain rubber feet grip best; on smooth acrylic shower pans, angled anti-slip tips resist sliding sideways. A heavy duty non slip bath seat is built with thicker aluminum tubing and a wider base to suit heavier users. ●Arms help a user push up to standing or lower themselves down gradually, and stop a sideways shift while washing. ●Backrest keeps the trunk supported so the user is not balancing while reaching for shampoo. ●No wheels in the shower — fixed feet only. Rolling seats belong outside the wet zone. Check the feet every week. A worn, rock-hard rubber tip is the most common reason a stable shower seat becomes a slippery one.5Materials and Draining: Aluminum, Plastic, and Waterproof Pads#ShowerChairMaterialsBathroom seating lives in constant moisture, so material choice decides how long it lasts. ●Aluminum frames resist rust and stay light enough to lift in and out of the tub. A rust-proof frame is the single most important material choice. ●Molded plastic seats are easy to clean but can become slick; choose a textured surface or one with drainage holes. ●Padded seats are comfortable for long showers but must be fully waterproof — a closed-cell pad that sheds water instead of soaking it. ●Drainage matters more than padding for comfort. Holes or channels let water pass through instead of pooling under the user. 6Swivel and Rotating Seats for Limited Mobility#SwivelShowerChairA user who cannot step over a tub wall safely can still bathe with a rotating seat. The technique with a comfortable non slip swivel shower chair is simple: sit down on the seat while it faces out of the tub, then rotate the seat inward. Getting out reverses the motion, so the user never has to twist their torso or lift a leg over the wall. Swivel seats are especially useful after hip or knee replacement, for users with limited range of motion, and for anyone whose caregiver is assisting a transfer. Look for a locking pin so the seat can be fixed in position during washing, and a textured surface so the user does not slide while rotating. ●Locking pin — so the seat can be fixed in position while washing.●Textured surface — so the user does not slide while the seat turns.●Matching height — the seat should meet the tub edge level for a smooth transfer.7Shower Commode Chairs: Bathing and Toileting in One#ShowerCommodeChairWhen a user needs help with both bathing and toileting, one piece of equipment is often better than two. A shower commode chair has an opening in the seat so it can be used over a toilet or as a standalone commode, while remaining waterproof and rollable into the shower. An aluminum shower commode chair for elderly users is a practical choice in a care home or family bathroom because it rolls from bedside to bathroom without a transfer. Where the bathroom is narrow, a shower commode chair for over toilet parks directly over the existing toilet and can be moved aside when guests visit. Lock the casters before any transfer, and never leave a user seated in a wheeled commode chair unattended. ●Locking casters — every wheel should lock before a transfer is attempted.●Seat opening size — wide enough for hygiene access, narrow enough to sit securely.●Removable pan — lets the same chair be used as a standalone bedside commode.8Setup, Cleaning, and Care Checklist#BathroomSeatCare 1Rinse the frame and seat with warm water after every use, then dry the rubber feet — soap film is what makes feet slide. 2Check the leg screws and push-button height pins once a month and tighten anything loose. 3Inspect the rubber tips for hardening, cracks, or wear and replace them as soon as the grip feels smooth. 4Use a mild bathroom cleaner only; bleach and abrasive powders dull plastic and dry out rubber. 5Confirm the seat is fully latched at the chosen height before every use — a half-engaged pin can drop mid-shower. 6Re-check the seat height and tighten all fittings again after the first week — they settle once the chair has been sat on repeatedly.★Final Takeaway#BathroomSafetyGuideBathroom seating is one of the least expensive and highest-impact safety upgrades a household can make. Match the type to the room — a chair or stool for a walk-in shower, a bath bench for a tub, a swivel seat for limited mobility, and a commode chair when toileting support is also needed — then get the height, width, and weight rating right. A removable bath bench or lightweight seniors folding shower chair stores flat when the bathroom is shared. Set it up once, check the feet and pins regularly, and the riskiest room in the house becomes the easiest one to use. Start with the room rather than the product: measure your shower or tub, decide whether you need a chair, a bench, or a commode chair, and only then compare models on seat height, width, and weight rating. ●Seat height 17–19 in — feet flat on the floor, hips and knees level.●Fixed feet only — no wheels inside the wet zone.●Weekly check — rubber tips, leg screws, and height pins.
    Read More
  • The Complete Guide to Home Wheelchair Accessibility: Room-by-Room Modifications for Seniors and Caregivers The Complete Guide to Home Wheelchair Accessibility: Room-by-Room Modifications for Seniors and Caregivers
    Oct 10, 2026
    Aging in place is the goal for most families, yet a standard home is rarely ready for a wheelchair, walker, or rollator. Here is the room-by-room order that gives the biggest safety return for the money — from measuring doorways to choosing the right ramp, bathroom support, and night-time equipment. HOT TOPICS — What this guide covers #MeasureFirst#EntrywayAccess#BathroomSafety#NightSafety#KitchenAccess#FlooringAndLight#OutdoorRamps#BudgetOrder 1Measure First: Doorways, Turning Circles, and RiseHOT#MeasureFirst Every accessible home starts with a tape measure, not a shopping cart. Walk the route a wheelchair, walker, or rollator will actually take and write the numbers down before you compare products. ● Clear doorway width: aim for 32 in (81 cm); 36 in is better for power chairs ● Turning circle: about 60 in (152 cm) for a manual wheelchair to pivot ● Rise: measure every exterior door lip, sliding-door track, and interior step ● Surface: concrete, decking, tile, or carpet changes slope, grip, and ramp choice Quick rule: if a walker passes with room to spare, a wheelchair will usually follow. 2Fix the Entryway and Every ThresholdHOT#EntrywayAccess The front door is the bottleneck of the whole house. If the doorway, the step, or the landing stops the chair, nothing inside matters yet. ● A lightweight wheelchair ramp for house entrances covers the usual 2-6 in rise at a porch or sliding door ● Keep the slope at 1:12 (one inch of rise per foot of length) wherever space allows ● Add a handrail on at least one side and keep the top landing flat and clear of mats ● For 1-2 in interior lips and balcony tracks, a small threshold ramp is enough 3Make the Bathroom the First Real ProjectHOT#BathroomSafety Bathrooms account for the largest share of household falls, so this room earns the first and biggest share of the budget. ● An adjustable height shower chair for seniors with non-slip feet keeps bathing seated and stable ● Grab bars at the toilet and tub, fixed into wall studs, not drywall anchors ● A hand-held shower head plus a non-slip mat removes the two riskiest moves in the room ● A raised toilet seat shortens the sit-to-stand transfer and pairs well with a commode chair 4Bedroom and Night-Time Safety#NightSafety Most night-time accidents happen on the way to the bathroom in the dark, so the bedroom fix is really about shortening that trip. ● A commode toilet chairs for handicapped and seniors style bedside commode removes the hallway trip entirely ● Keep a clear 36 in path from the bed to the door, with nothing stored in it ● Put a lamp within reach of the mattress and add motion night lights on the route ● Set the bed height so feet touch the floor with knees at 90 degrees for a safe transfer 5Kitchen and Living Areas: Reach, Turn, and Grip#KitchenAccess ● Lower one counter section to about 31 in for seated meal prep — you rarely need the whole kitchen ● Move daily items to the knee-to-shoulder band so nothing needs a stretch or a step stool ● Leave a turning circle in front of the sink, fridge, and main cupboard doors ● Replace thick rugs with low-profile mats taped at the edges, and lever handles for round knobs 6Hallways, Flooring, and Lighting#FlooringAndLight ● Clear width beats decoration: keep corridors free of consoles, plants, and floor lamps ● Swap deep-pile carpet for low-pile or hard flooring, which needs noticeably less push effort ● Aim for even, shadow-free light along the full route rather than one bright ceiling fixture ● Repair lifted thresholds and loose edge strips — small trip points become serious at walking-aid height 7Outdoor Approaches and Ramps#OutdoorRamps ● An outdoor wheelchair aluminum ramp with handrail handles porch and garden steps without permanent building work ● An aluminum residential wheelchair ramp suits a fixed entrance used every day, with a level landing at the top ● Check drainage and ice: a ramp that stays wet or frozen is more dangerous than the step it replaced ● Portable modular ramps can be moved between the front door and a back garden door as needs change 8Budget and Priority Order#BudgetOrder Spend in this order. Each step removes more risk per yuan than the next one. 1Bathroom: shower seat, grab bars, raised toilet seat 2Main entry: ramp, handrail, level landing 3Bedroom and the night-time route to the bathroom 4Kitchen and living areas: reach ranges and turning space 5Hallways, flooring, and lighting 6Outdoor approaches and secondary doors ★The Bottom Line ● Accessibility is a series of small, measurable fixes — not one renovation ● Measure doorways, thresholds, and turning space before you buy anything ● Prioritise the bathroom and the main entry; they carry the most risk ● Choose modular, lightweight equipment that can move with the household Quick check: 32 in doorway, 60 in turning circle, 1:12 ramp slope, grab bars at the toilet and tub.
    Read More
1 2

A total of2pages

leave a message
leave a message
If you are interested in our products and want to know more details,please leave a message here,we will reply you as soon as we can.

Home

Products